Overview
Order Groups allow you to create smaller, targeted vendor lists within your main Fee Panel. By grouping vendors for specific use cases, such as branch locations or client‑specific needs, you can limit which vendors are eligible for assignment on a given order. This article explains how to create, manage, and maintain Order Groups, as well as how to assign vendors to them.
Mercury Network®'s Order groups are effectively miniature fee panels you can setup within your custom fee panel. These Order groups allow you to set up "special case" groups of vendors within your fee panel to limit the range of vendors available for a given order to a specific set. For instance, if your organization has office branches in a number of different locations, you might set up Order groups for each branch to limit the vendor choices for each branch to just those vendors that are nearby to each branch. Order groups can contain any type of vendor.
Vendors can be grouped by client, then used with the Order groups feature of Client groups to set eligible and ineligible vendors for a particular client.
To set up Order groups in Mercury Network®:
Click Order Groups in the top toolbar.
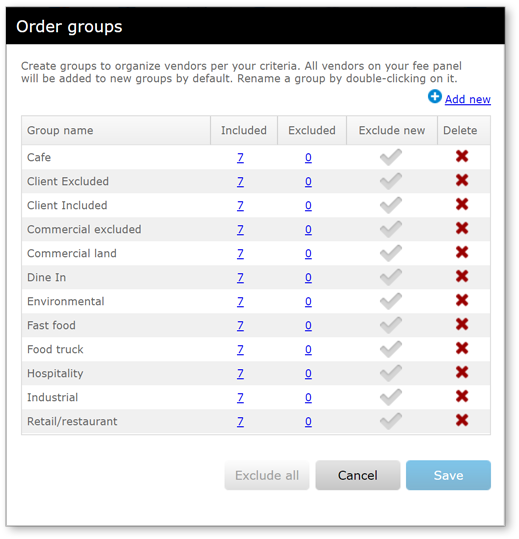
There are several things you can do here:
Click Add new to create a new order group.
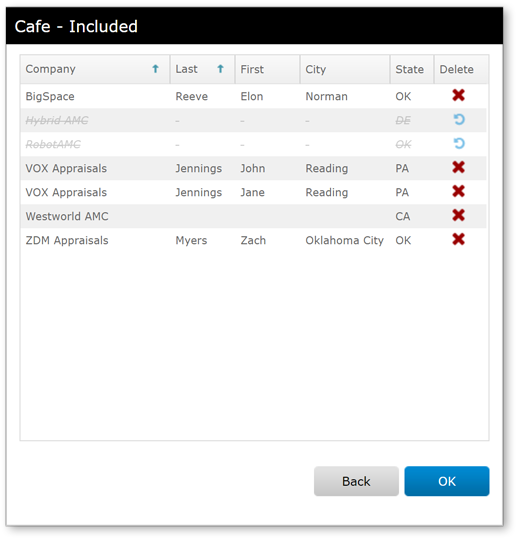
Click the number in the Included column to see which vendors will be used for the order group. When you do, you'll see a window that shows excluded and included vendors. Click to exclude any vendor, or click to restore excluded vendors.
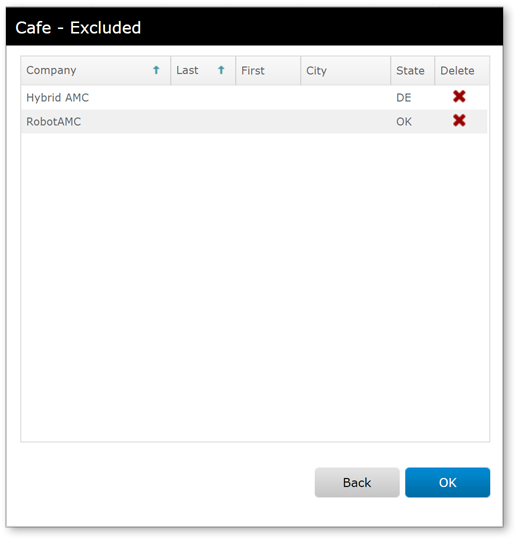
Click the number in the Excluded column to see any vendors which are excluded for the order group. When you do, you'll see a window which shows any excluded vendors. Click X icon to delete them from the excluded list so they can be used for this order group.
Click Exclude all to exclude all the vendors in the selected order group.
Click Save when finished to return to your Fee Panel.
To delete an order group, click the red X icon in the Delete column, then click Save. If, before clicking save, you decide to keep the order group, click the Deselect icon then click save to keep your changes. To rename an order group at any later time, return to the Order Groups screen, place your cursor on the name you intend to change, then click to select so you can type the name you want.
Assign Vendors to Order Groups
To assign a vendor from your fee panel into a specific order group:
In the Mercury Network® Fee Panel, click View in the Order Groups column beside the vendor you want to assign to a group.
Check the box beside each group you wish to include the vendor in or uncheck a box to remove a vendor from an order group.
Click Save when finished to keep your changes.
Outcome
After completing these steps, you will be able to create and manage Order Groups, include or exclude vendors as needed, and assign vendors from your Fee Panel to one or more groups. You will also know how to rename or delete groups and use them to control vendor eligibility for specific orders or clients, helping you keep vendor selection organized and precise.