Overview
Building your Fee Panel using qualified vendors from Mercury Network® allows you to expand your vendor pool while maintaining control over quality, coverage, and performance standards. By applying specific criteria such as licensing, coverage areas, and performance thresholds, you can generate a targeted list of vendor candidates that meet your organization’s requirements. This article explains how to add, search for, review, and select appraisers directly from the Mercury Network® roster.
How to add an Appraiser to your Fee Panel
To select from a list of qualified vendors on Mercury Network®.
Click Fee Panel.

Click Build fee panel in the top toolbar.
In the screen that appears, mark the Mercury Network® vendors option and click Next.
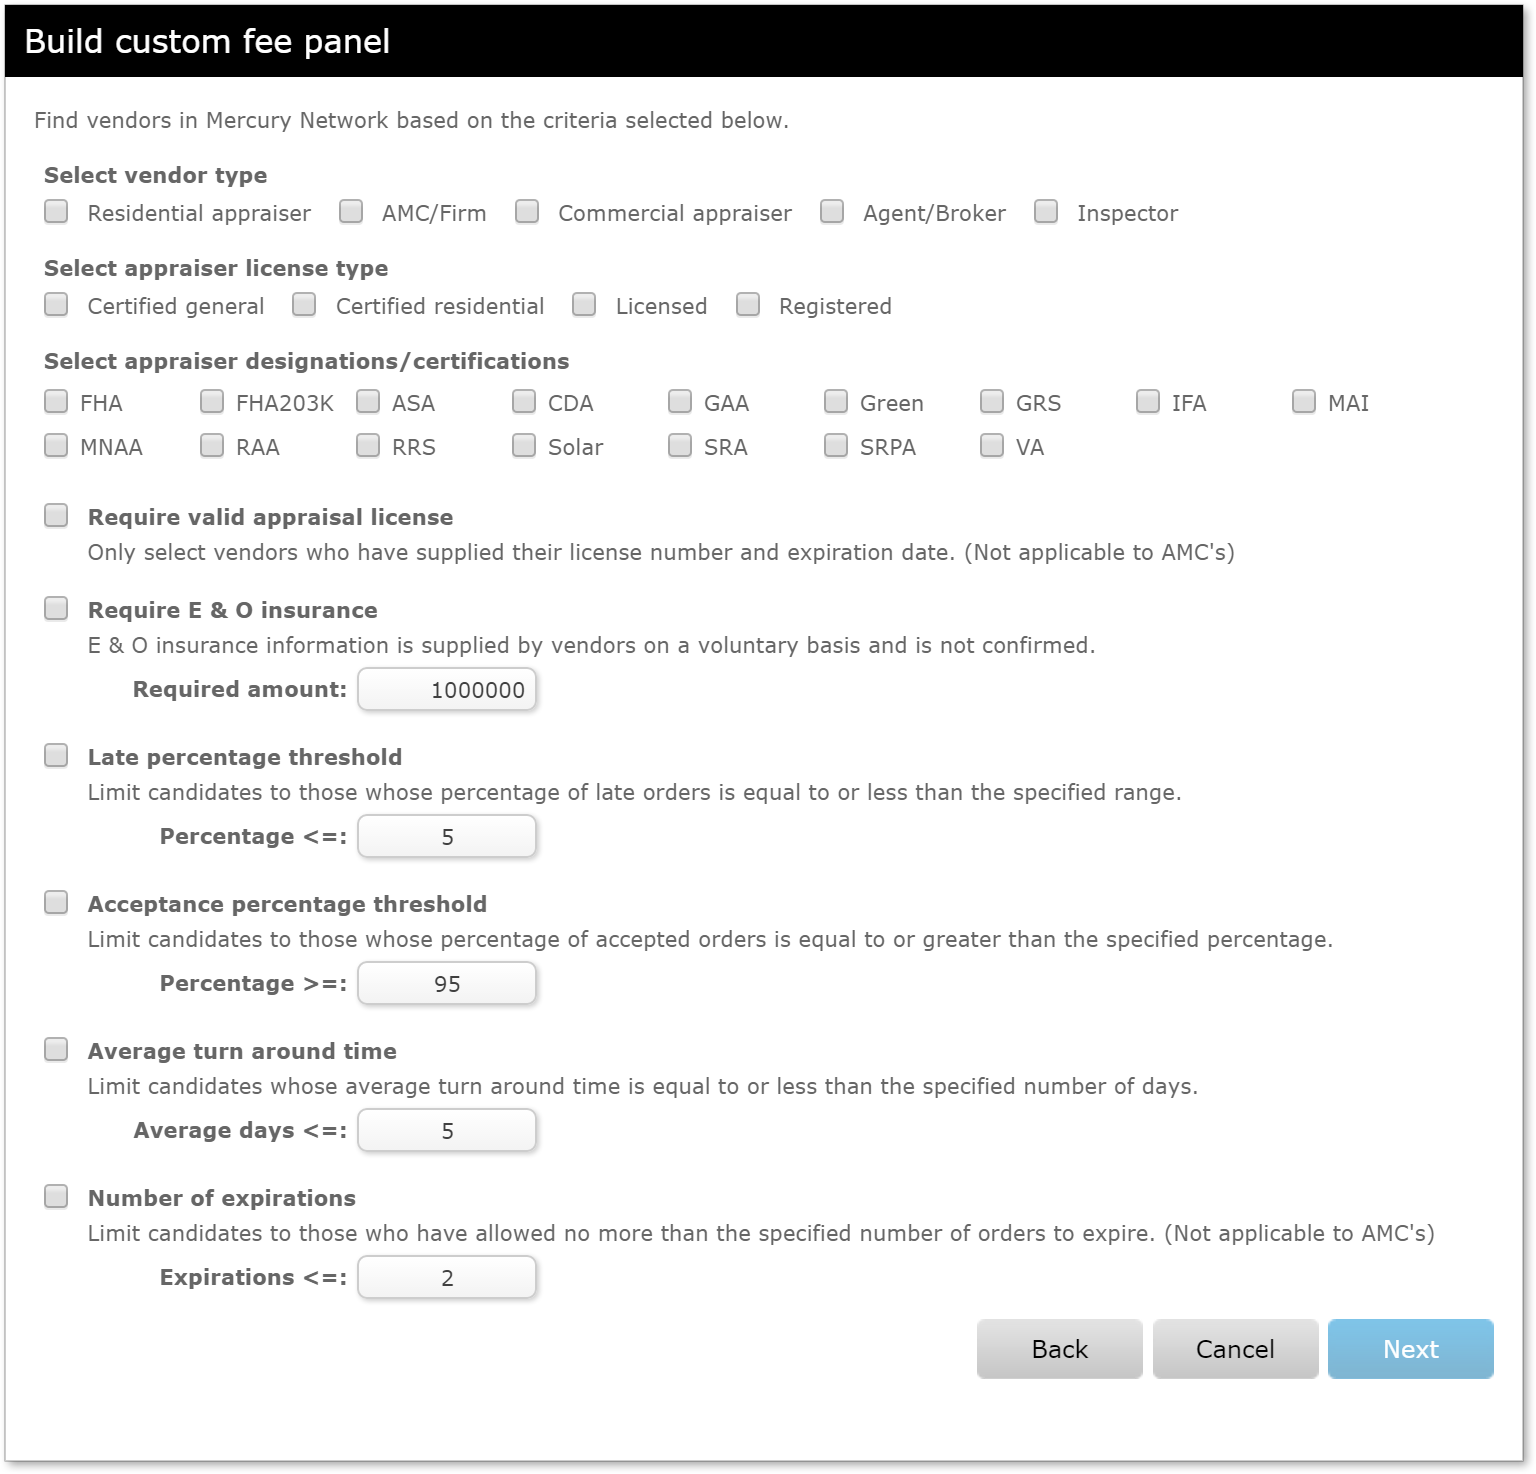
Mark the criteria you want to use to limit your vendor candidate list and then click Next.
Be sure to specify limits in the boxes provided. Options include:
Vendor type
Appraiser license type
Select appraiser designations/certifications
Require a valid appraisal license
Require E&O insurance
Late percentage threshold
Acceptance percentage threshold
Average turn around time
Number of expirations
From the list of states and counties, select the states and counties where you require coverage. To select multiple counties at a time, hold down Ctrl on the keyboard while you click to select them individually or hold down Shift while you click to select counties in groups. You can also double-click on a state to select all counties in the state. Once you've selected the counties you need, click Select to add them to your list.
Click Finish to view your appraiser candidate list.
From the candidate list, you can accept or reject any or all candidates. The best way to review a candidate is to click on the View profile icon to the left of the company name in the candidate list.
Note: Any candidates that have no license or coverage area listed in their Mercury Network® profiles will be noted by a caution symbol and you should consider requesting this information from the candidate so you can accurately gauge the vendor's qualifications.
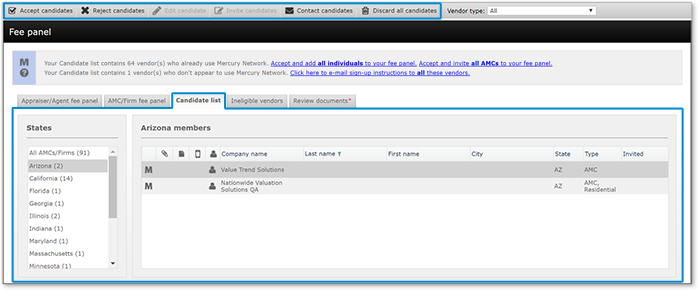
To accept some candidates - Click the vendors you wish to accept while holding down the Ctrl key on your keyboard. Once you've selected the vendors you want to accept, click Accept Candidates in the toolbar. Then, click Yes to confirm your acceptance.
To accept all of the individual candidates - Click the Accept and add all individuals to your fee panel link above the candidate list. Then, click Yes to confirm your acceptance.
To accept all of the AMC candidates - Click on the Accept and invite all AMCs to your Fee panel link above the candidate list. Then, the email editor will appear so you can prepare your invitation email which will be sent to all the AMCs in the candidate list.
To reject some candidates - Click the vendors you wish to reject while holding down the Ctrl key on your keyboard. Once you've selected the vendors you want to reject, click Reject Candidates in the toolbar. Then, click Yes to confirm your rejection.
To reject all of the candidates - Click Discard All Candidates in the top toolbar. Then, click Yes to confirm your rejection.
Outcome
After completing these steps, you will be able to generate a customized list of qualified vendor candidates, review their profiles, and accept or reject individuals or AMCs as needed. You will also know how to apply performance and coverage filters to refine your results, allowing you to build and maintain a Fee Panel that aligns with your operational and quality expectations.